Introduction: Why You Should Try a Sourdough Bread Recipe
A sourdough bread recipe is more than just a baking project—it’s an artful balance of fermentation, time, and technique. Unlike conventional yeast-based breads, sourdough relies on wild yeast and bacteria, creating a unique tangy flavor and chewy texture. This natural fermentation process develops complex flavors and enhances the bread’s digestibility. The long, slow rise also improves the nutritional profile, making it a healthier alternative to commercially processed bread. Whether you’re a beginner or an experienced baker, mastering a sourdough bread recipe is a deeply rewarding experience that brings traditional bread-making to life.
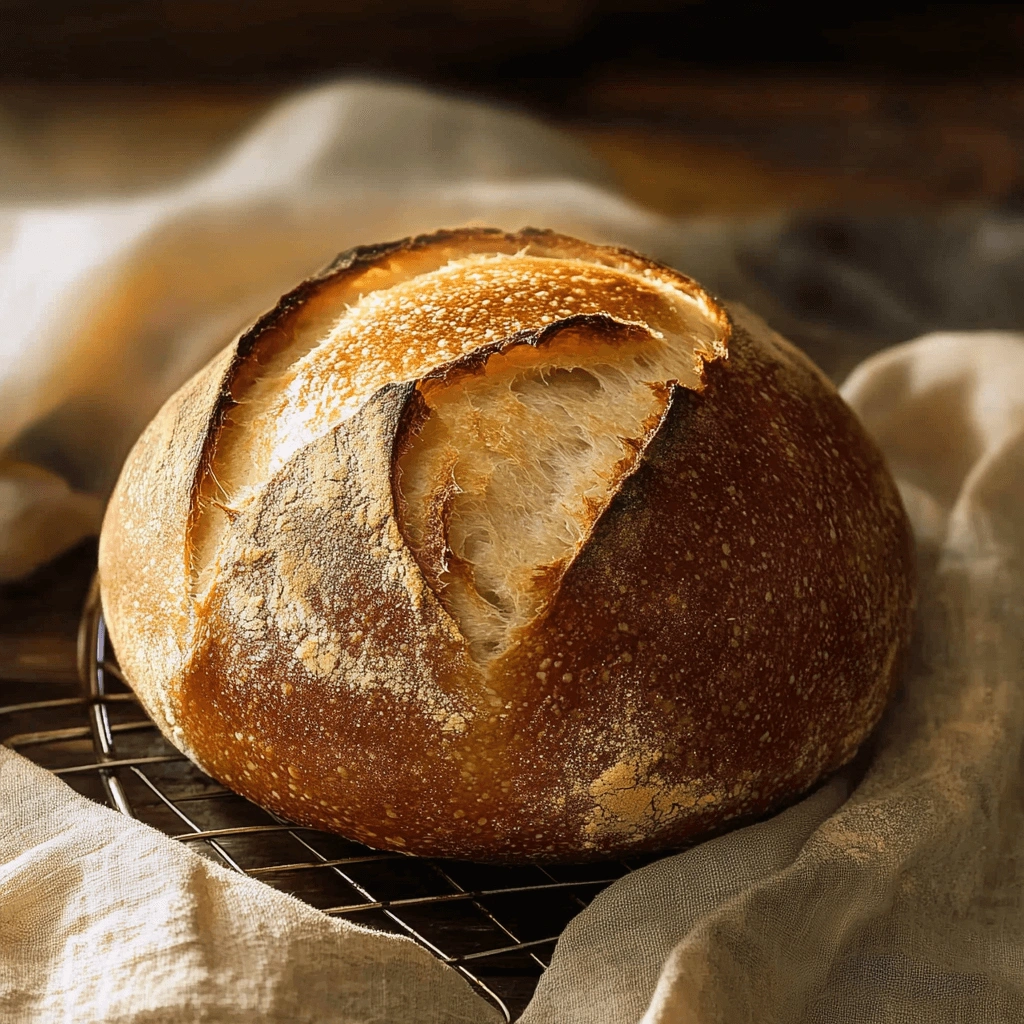
The Unique Flavor and Texture of Sourdough Bread
Tangy and complex taste – A result of the natural fermentation process.
Crisp, golden crust – Achieved through steam baking and proper scoring.
Soft, airy crumb – Perfect for sandwiches, toast, and artisan loaves.
Pro Tip: Let your sourdough bread recipe ferment overnight for deeper flavors and a light, open crumb.
How Sourdough is Different from Commercial Yeast Bread
Uses wild yeast instead of commercial yeast.
Takes longer to ferment but develops more flavor and nutrients.
Simpler to digest as fermentation helps break down gluten.
For another fermentation-based recipe, check out this homemade pickled sausage guide.
The Health Benefits of Fermented, Naturally Leavened Bread
A sourdough bread recipe isn’t just delicious—it’s nutrient-rich and gut-friendly.
Easier digestion – Fermentation breaks down gluten, making it easier on the stomach.
Lower glycemic index – Doesn’t cause rapid blood sugar spikes.
Rich in probiotics – Promotes a healthy gut microbiome.
Pro Tip: Use whole wheat flour in your sourdough bread recipe for extra fiber and nutrients.
Understanding the Science Behind a Sourdough Bread Recipe
Before diving into the actual sourdough bread recipe, it’s essential to understand the fermentation process.
The Role of Wild Yeast and Bacteria in Fermentation
Wild yeast (Saccharomyces cerevisiae) helps the bread rise naturally.
Lactic acid bacteria create the tangy sourdough flavor.
Long fermentation allows for better texture and digestibility.
Pro Tip: Keep your starter at room temperature to encourage strong yeast activity.
How Sourdough Develops Its Tangy Taste and Chewy Texture
The sour flavor comes from lactic acid and acetic acid produced during fermentation.
Lactic acid – Creates a mild tang and soft texture.
Acetic acid – Adds a sharper tang and chewier crust.
Pro Tip: For more tang, let your dough cold ferment in the fridge for 12-24 hours.
Why Slow Fermentation Improves Digestibility
Reduces phytic acid, making minerals more accessible for absorption.
Reduces gluten, making it easier to digest.
Enhances flavor, creating a more complex, artisanal taste.
For another fermented food recipe, check out this gluten-free couscous guide.
Essential Ingredients for a Perfect Sourdough Bread Recipe
A good sourdough bread recipe only requires three basic ingredients, but the quality of each ingredient makes a huge difference.
Choosing the Best Flour (Bread Flour vs. Whole Wheat)
Bread flour – High in protein (12-14%), creates a strong gluten network.
Whole wheat flour – Adds fiber, nutrients, and earthy flavor.
Rye flour – Boosts fermentation activity, great for starters.
Pro Tip: Mix bread flour and whole wheat flour for a balanced texture.
The Importance of Hydration Levels and Water Quality
Higher hydration (75-80%) – Creates a soft, airy crumb.
Filtered water – Avoids chlorine, which can harm yeast activity.
Adjust hydration based on flour type and climate.
Pro Tip: Wetter doughs result in an open crumb structure, but are harder to handle.
Why Salt Matters in Sourdough Fermentation
Enhances flavor – A small amount of salt elevates the bread’s taste.
Controls fermentation – Slows down yeast activity for better texture.
Strengthens gluten – Helps maintain a stable dough structure.
Pro Tip: Add salt after autolyse (resting flour and water) for a more even dough consistency.
For more baking essentials, check out this baby bella mushrooms guide.
How to Make and Maintain a Sourdough Starter
A sourdough starter is the foundation of any sourdough bread recipe. This mixture of flour and water captures wild yeast and bacteria, allowing the dough to rise naturally.
Step-by-Step Guide to Creating a Wild Yeast Starter
Day 1:
Mix ½ cup flour and ¼ cup water in a jar.
Cover loosely and let sit at room temperature (70-75°F).
Day 2-5:
Discard half and feed with ½ cup flour + ¼ cup water.
Stir and let it ferment, repeating daily.
Pro Tip: After 5-7 days, your sourdough starter should be bubbly and active.
Feeding, Maintaining, and Troubleshooting Your Starter
Daily feeding – If kept at room temperature.
Weekly feeding – If stored in the fridge.
Signs of a healthy starter – Bubbles, tangy aroma, and rising after feeding.
Common issues:
Too runny? – Add more flour.
Not rising? – Keep it in a warmer spot.
For another homemade fermentation guide, check out this homemade Mounjaro drink.
Signs That Your Starter is Ready for Baking
Doubles in size within 4-6 hours of feeding.
Has a pleasant, slightly tangy smell.
Passes the “float test” – A spoonful floats in water.
Pro Tip: A mature starter makes the best sourdough bread recipe.
Step-by-Step Sourdough Bread Recipe: Mixing and Kneading the Dough
How to Properly Mix Flour, Water, Salt, and Starter
A great sourdough bread recipe starts with a well-mixed dough. Unlike conventional bread doughs, sourdough requires a more gentle approach to avoid overworking the gluten.
Basic Sourdough Dough Ingredients:
500g (3 ¾ cups) bread flour
350g (1 ½ cups) filtered water
100g (½ cup) active sourdough starter
10g (2 tsp) salt
Mixing Instructions:
Combine flour and water – Mix in a bowl until a rough dough forms. Let it rest for 30-45 minutes (this is called autolyse, which improves texture).
Add the sourdough starter – Gently knead it into the dough until incorporated.
Mix in salt – Sprinkle salt over the dough and knead gently until it dissolves.
Pro Tip: Use damp hands when handling the dough to prevent sticking.
Stretch and Fold Technique for Gluten Development
Instead of aggressive kneading, sourdough benefits from a stretch-and-fold technique to develop gluten strength.
How to Stretch and Fold:
Grab one side of the dough, stretch it up, and fold it over itself.
Rotate the bowl at 90° and repeat on all sides.
Do this 3-4 times with 30-minute intervals between each.
- Creates a strong dough structure
- Promotes an airy crumb with good elasticity
- Prevents overworking the dough
Pro Tip: If the dough feels very slack, add an extra stretch and fold session.
Avoiding Common Mistakes in Dough Preparation
Over-mixing: Can cause dense, tight crumbs.
Skipping autolyse: Results in a weaker gluten network.
Not handling gently: Rough handling can deflate air pockets.
For another detailed guide on handling dough, check out this pepper steak recipe guide.
Bulk Fermentation: The Key to Great Sourdough Bread
Understanding the First Rise and Its Importance
Bulk fermentation is the longest and most crucial step in a sourdough bread recipe. This process develops flavor, strengthens the dough, and builds structure.
Takes 4-6 hours at room temperature (70-75°F)
Allows wild yeast and bacteria to create gas for rising
Fermentation breaks down phytic acid, making bread more digestible
Pro Tip: If your kitchen is cold, bulk fermentation may take longer—place the dough in a warmer spot for better results.
How to Stretch and Fold for Strong Dough Structure
1st hour: Perform a stretch and fold every 30 minutes.
2nd to 4th hour: Let the dough rest undisturbed to develop volume.
When is it ready? The dough should expand by about 50% and have a slightly domed shape.
Pro Tip: Over-proofing during this stage can lead to deflated, weak dough.
For another fermented food recipe, check out this gluten-free couscous guide.
Determining When the Dough is Ready for Shaping
Passes the “poke test” – Lightly press the dough. If it springs back slowly, it’s ready.
Has visible bubbles on the surface.
Feels airy and jiggly when you move the bowl.
Pro Tip: If the dough doubles in size, it may be over-proofed. Watch for a 50% increase instead.
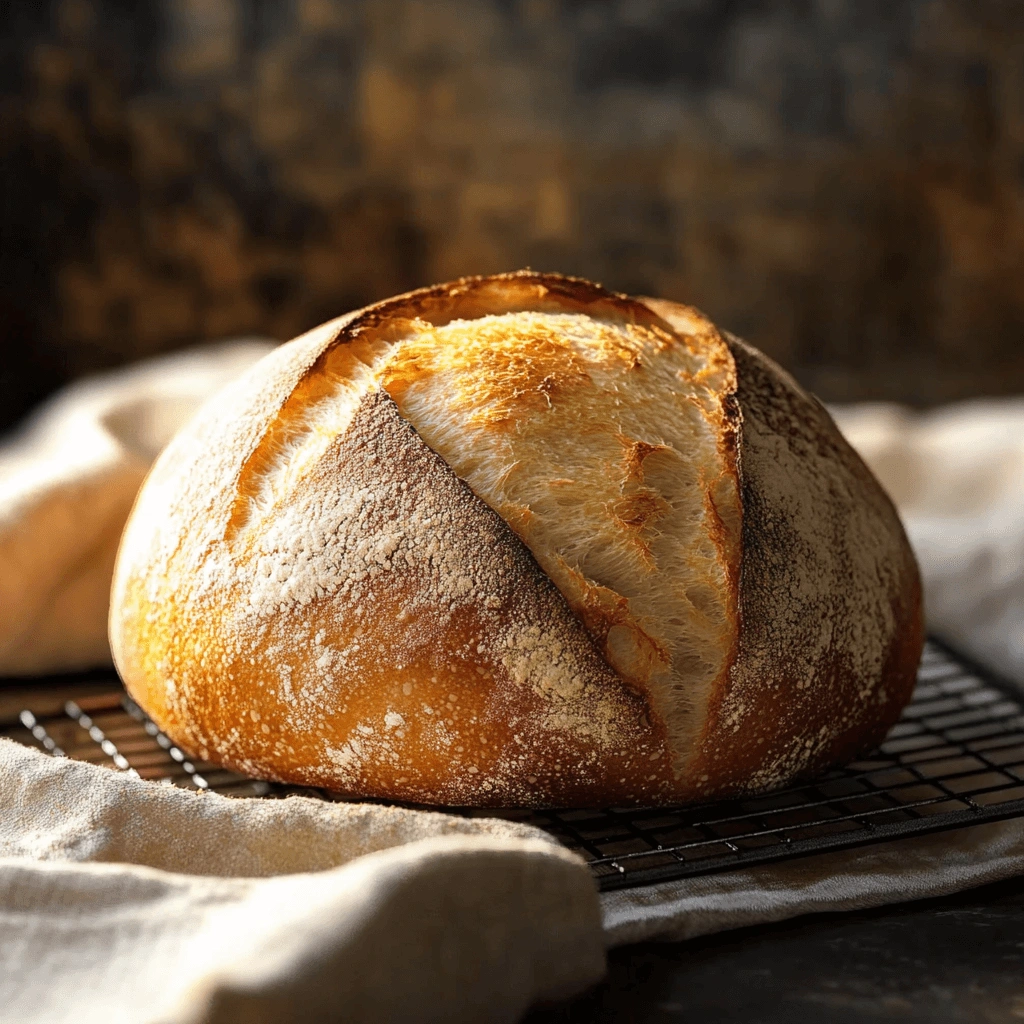
Shaping Your Sourdough Loaf for the Best Rise
After bulk fermentation, it’s time to shape the dough to maximize oven spring and create a well-structured loaf.
How to Shape a Round (Boule) or Oval (Batard) Loaf
For a round boule:
Lightly flour the surface and your hands.
Flatten the dough gently into a round disc.
Fold the edges toward the center and turn it seam-side down.
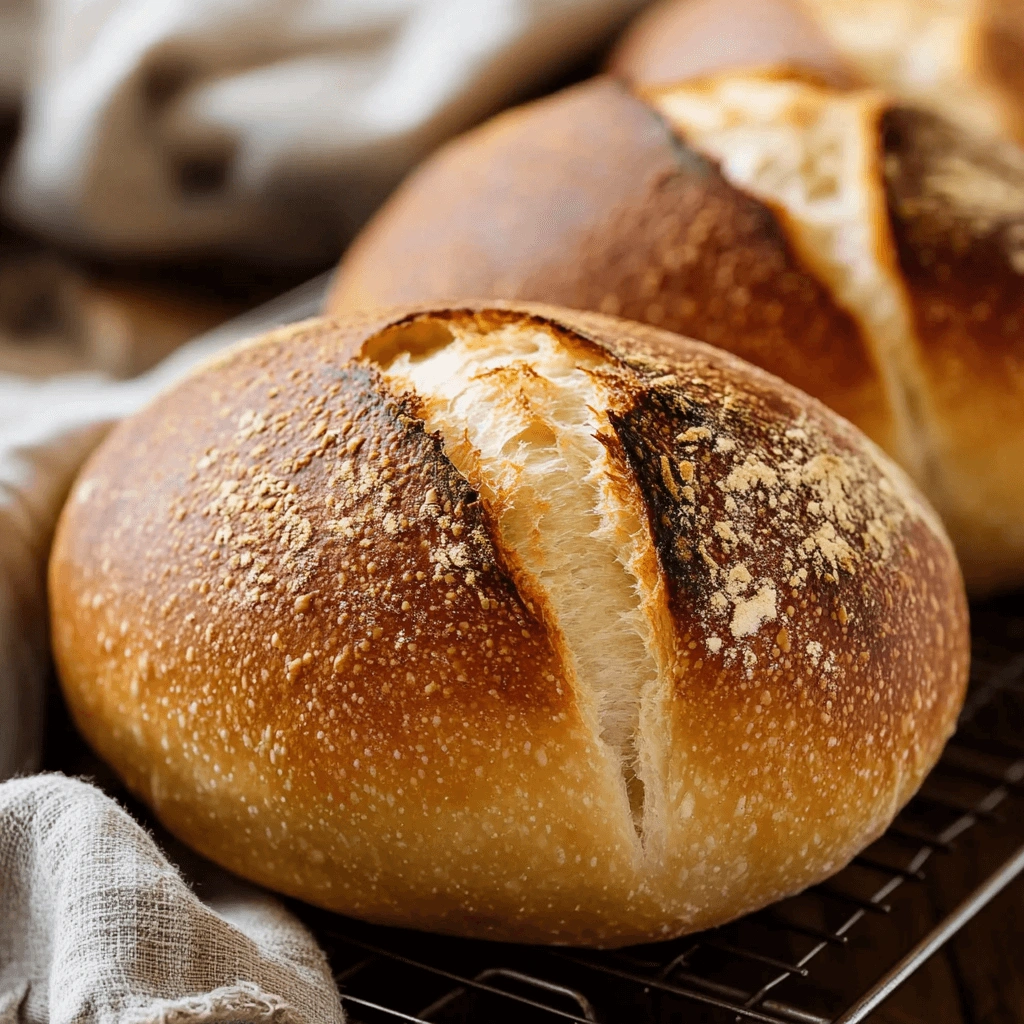
For an oval batard:
Flatten the dough slightly into a rectangle.
Fold one side toward the center, then roll it up tightly.
Pro Tip: Light shaping is key—too much force can degas the dough.
The Importance of Surface Tension for Oven Spring
Creates a taut outer skin that holds shape during baking.
Prevents excessive spreading in the oven.
Encourages upward rise instead of flat loaves.
Pro Tip: Pull the dough toward you while shaping to increase surface tension.
Tips for Using a Banneton (Proofing Basket)
Lightly flour the banneton to prevent sticking.
Place dough seam-side up so it flips out properly.
Use rice flour for a non-stick surface.
For more baking techniques, check out this baby bella mushrooms guide.
Cold Proofing: Why It Improves Your Sourdough Bread Recipe
Cold proofing (retarding) is the secret to a deeply flavorful, airy loaf.
How Overnight Fermentation Enhances Flavor and Texture
Slows down yeast activity, allowing for a more complex flavor.
Improves texture, resulting in a light, open crumb.
Makes dough easier to handle before baking.
Pro Tip: Cold proofing is best between 12-24 hours in the fridge.
Ideal Proofing Times for Best Sourdough Results
12 hours: Balanced flavor and mild tang.
16-18 hours: Stronger tangy taste and better texture.
24 hours: Maximum depth of flavor, but requires careful handling.
Pro Tip: Let the dough sit at room temperature for 30 minutes before baking after cold proofing.
How to Tell If Your Dough is Properly Proofed
Passes the “finger dent test” – Lightly press the dough. If the indentation springs back slowly, it’s ready.
Has slight bubbles on the surface.
Feels light and airy when touched.
For another fermentation-based recipe, check out this homemade Mounjaro drink.
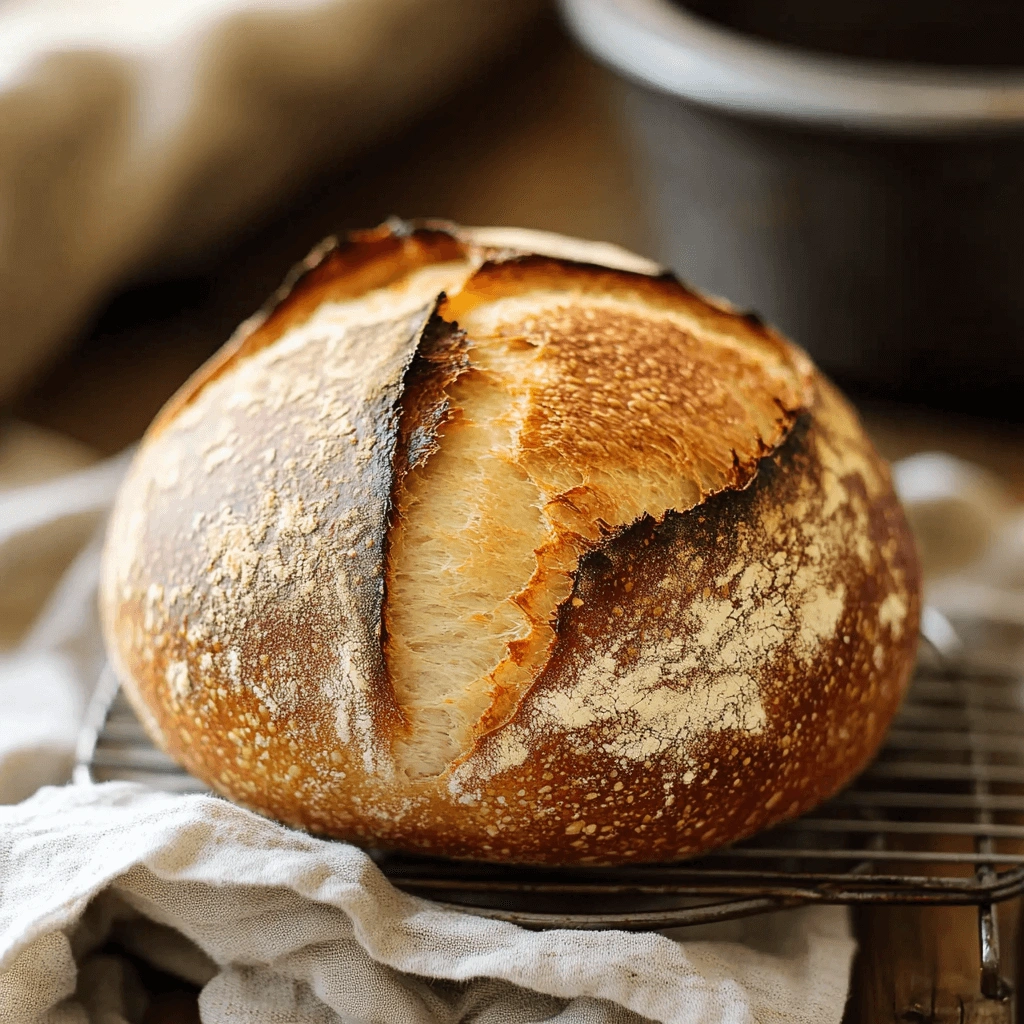
Baking Your Sourdough Bread Recipe: Achieving the Perfect Crust
Baking is where all the fermentation and shaping work pays off. The key to a crispy crust, deep flavor, and open crumb in any sourdough bread recipe is proper heat control, steaming, and scoring techniques.
Using a Dutch Oven for Professional-Style Baking
A Dutch oven is one of the best tools for achieving artisan-style sourdough bread at home. It creates a humid environment that allows the dough to expand fully before the crust sets, resulting in a light, airy crumb, and a crispy, golden crust.
Steam keeps the crust soft, allowing the bread to expand.
Traps heat, helping with even baking.
Creates a crisp, golden crust for bakery-style results.
How to Bake Sourdough Bread in a Dutch Oven
Preheat the oven to 475°F (245°C) with the Dutch oven inside for at least 30 minutes.
Carefully place the shaped dough onto parchment paper and transfer it into the hot Dutch oven.
Cover with the lid and bake for 20 minutes (traps steam).
Remove the lid and bake for another 20-25 minutes until golden brown.
Pro Tip: If you don’t have a Dutch oven, place a tray of hot water on the bottom rack to create steam, which helps achieve a great crust in your sourdough bread recipe.
How to Properly Score the Dough for the Best Oven Rise
Scoring helps control expansion, preventing random cracks and ensuring a beautifully shaped sourdough bread loaf.
Use a bread lame or sharp razor blade to make clean cuts.
Hold the blade at a 45° angle and score ½ inch deep.
For a round loaf (boule): One large slash across the top.
For an oval loaf (batard): A long cut down the center or two diagonal cuts.
Pro Tip: Scoring deeper encourages higher oven spring, while shallow cuts create decorative patterns that enhance the final look of your sourdough bread recipe.
Adjusting Baking Times for a Crispier or Softer Crust
For an extra crispy crust: Bake 5-10 minutes longer with the oven slightly vented.
For a softer crust: Wrap the loaf in a towel after baking to retain moisture.
For a darker, caramelized crust: Increase the oven temp to 485°F (250°C) for the first 10 minutes.
For another crispy baked dish, check out this pepper steak recipe guide.
Troubleshooting Common Issues with a Sourdough Bread Recipe
Even experienced bakers face challenges when making a sourdough bread recipe. Here are solutions to the most common problems.
Why Your Sourdough Bread Didn’t Rise: Starter Strength and Fermentation
Weak starter? Feed it for several days until it doubles in size before baking.
Too little fermentation time? Let the dough bulk ferment longer until it rises 50% in volume.
Cold kitchen? Fermentation slows in cold environments—try proofing in a warm spot.
Pro Tip: If your starter takes too long to rise, try using rye flour for extra fermentation power in your sourdough bread recipe.
Fixing a Dense, Gummy, or Overly Sour Crumb
Dense crumb? The dough didn’t ferment long enough—allow more time for bulk proofing.
Gummy texture? The bread may be underbaked—bake 5-10 minutes longer.
Too sour? Overproofing can cause excessive tang—reduce cold fermentation time.
Pro Tip: If your sourdough lacks structure, try an extra stretch-and-fold session during bulk fermentation.
For another fermentation-based recipe, check out this gluten-free couscous guide.
Preventing Common Mistakes Like Overproofing or Underbaking
Overproofed dough? It will collapse—reduce proofing time.
Underproofed dough? The bread will be dense—let it rise longer before baking.
Baked too quickly? The crust might be too thick—use lower heat for longer baking.
For more baking techniques, check out this baby bella mushrooms guide.
Storing and Enjoying Your Homemade Sourdough Bread Recipe
Proper storage ensures your sourdough bread recipe stays fresh and delicious.
Room temperature: Wrap in a cotton towel and store cut-side down for 2-3 days.
Freezer storage: Slice and freeze in a ziplock bag for up to 3 months.
Avoid plastic bags—they make the crust soft and chewy instead of crisp.
Pro Tip: Store your sourdough bread recipe in a paper bag or bread box to maintain texture.
How to Reheat and Revive Sourdough Bread
Crispy crust: Reheat in a 350°F (175°C) oven for 10 minutes.
Soft crumb: Wrap in foil before reheating to retain moisture.
Microwave? Not recommended—it makes sourdough chewy and tough.
For another baking-based guide, check out this chokecherry pudding recipe.
Creative Ways to Use Leftover Sourdough (Croutons, French Toast, etc.)
Homemade croutons: Toss with olive oil, salt, and herbs, then bake until crispy.
Sourdough French toast: Soak slices in egg, milk, and cinnamon, then pan-fry.
Bread crumbs: Blend dried sourdough for homemade breadcrumbs.
Pro Tip: Stale sourdough bread makes the best stuffing and panzanella salad!
Conclusion: Why This Sourdough Bread Recipe is Worth Trying
Baking a sourdough bread recipe is a rewarding process that combines art and science. With just flour, water, and salt, you can create beautiful, naturally leavened bread at home.
Final Pro Tip: Keep a baking journal to track your sourdough experiments!
Share Your Sourdough Success Stories!
Have you tried making this sourdough bread recipe? Share your experience and tips in the comments!
For even more bread-baking inspiration, check out AllRecipes for additional techniques.